LongHouse Reserve 2010 Season
Outdoor Bench #2 at The LongHouse Reserve
May 1 – October 9, 2010
Rites of Spring season opening reception: 2-5pm May 1 2010 (open to the public and a great introduction to the LongHouse)
The longhouse is open to the public on Wednesday and Saturday through the end of June. July and August see the days extended to Wednesday through Saturday. In both cases the hours are 2pm-5pm
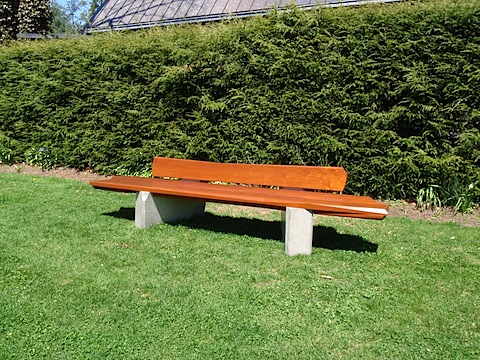
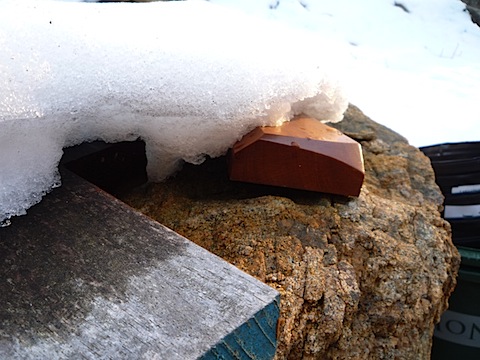
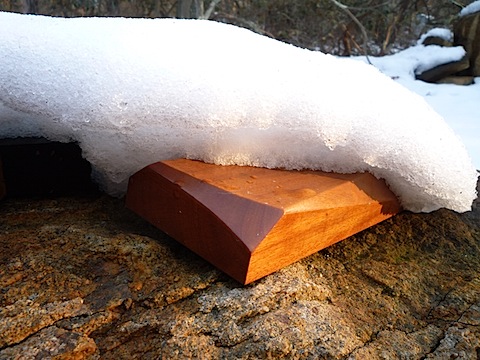
The LongHouse Reserve in East Hampton NY is about to open for the 2010 season. I am delighted to have Outdoor Bench #2 in the magnificent gardens for another year. Below is the last picture I took of the installation last year. I got the impression that the bench will be in a new location this year. I cant wait to see where they want it!

Update: Bench #4 from Bench Series #2 is now at the Longhouse!
Outdoor Furniture – Overview
I started making outdoor benches a few years ago in the hopes of making my work available to a broader range of people. I had heard “I cant fit that 10 foot bench in my home” one too many times. Needless to say I have a propensity to build large pieces of furniture and the boundaries of the home can often be a harsh reality. My solution was to turn to the great outdoors. With that decision I had to address a number of technical considerations so that I could put my work outside with confidence.
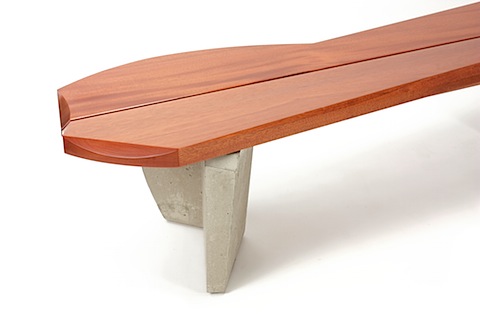
The first consideration is how will the bench contact the ground? Wood and dirt is not a great combination. Dirt offers a direct path for insects to attack and the dirt holds moisture like a sponge. Snow and wood contact is also a problem so the farther the wooden components are from the ground the better. My solution was to introduce cast concrete into my work. Cast concrete legs have some real advantages over wood legs in outdoor work. The main advantage is that it is far easier to make concrete last for years in a harsh outdoor environment. This advantage stems from the fact that properly cast concrete is dense and not very porous. The pathways that do exist can be sealed with any number of products that work amazingly well. The freeze thaw cycle and extremes of heat, rain and snow will have almost no effect of the castings years down the line. I do not feel that I have to make a case for the material since it is one of the most used products that man has ever come up with. The challenge for me was developing a vocabulary with the castings that fit with my work. I introduced complex shapes and added facets into the forms to allow each one the potential to be to be different. Another advantage to cast concrete as a material for outdoor furniture is its weight. The bench pictured below is at the Longhouse Reserve in East Hampton NY so it is well protected but at 600 pounds it is not going to walk away regardless of where it is installed.
Now to discuss the wood components in my outdoor furniture. The discussion must begin with the actual choice of wood. There are a number of species that come to mind as suitable for outdoor furniture. They all have one thing in common. They have natural defenses that seal the fibers in their structure. Each species accomplishes this task differently but a brief overview of how White Oak does it may be helpful. White Oak and Red Oak have a similar structure. They are comprised of open fibers, think drinking straws. This means that water will get pulled into the wood via capillary action. Not great characteristics for an outdoor wood. White Oak has a trick- the open fibers are plugged with a growth called Tyloses. This anomaly allows White Oak to be water proof making it a suitable wood for outdoor furniture, wine barrels ect. There is one other consideration when choosing a wood- insects. I like to work with Mahogany, Sapele or Ipe because they all are excellent outdoor woods and have the bonus of naturally repelling insects.
Now for the tough part… the finish. Most outdoor furniture ends up the same color regardless of the species used. That color is gray. I have tested a number of different finishes over the years that offer the best protection and the longest maintenance cycle. Here is a shot of my torture test. The sample on the left has failed and the wood had gone gray. The sample on the right is the same age (this is its second winter) and the finish is still intact! There are other samples buried under the snow but they are not worth mentioning. The winning combination is a first coat of Sikkens Cetol 1 with two top coats of Last n Last Marine and Door varnish.
I suggest a touch up coat of the Last n Last each 1 to 2 years depending on the environment that the bench is in. The reapplication process is quite simple and will ensure that the wood remains in its full glory. I hope that this helps explain my approach to the challenging aspects of outdoor furniture. These pieces have added a new dimension to my work and opened up a number of new opportunities that would not have been available to me.
Mirror With Two Drawers – Dovetails
This new piece offers one more technical woodworking process that has not yet made an appearance in these ramblings. The dovetail is one of the classic woodworking joints that speaks of craftsmanship and individuality. I will be using the joint to make the drawers.
The drawer stock has been cut to side and the layout process can now begin. I set a marking gauge to the exact thickness of the drawer side
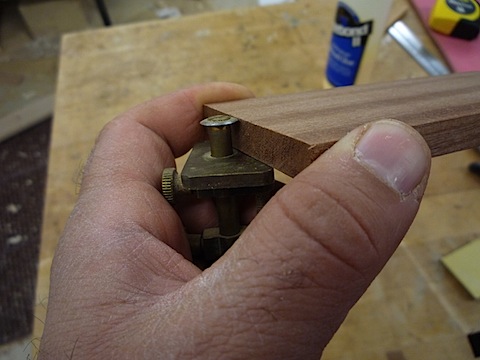
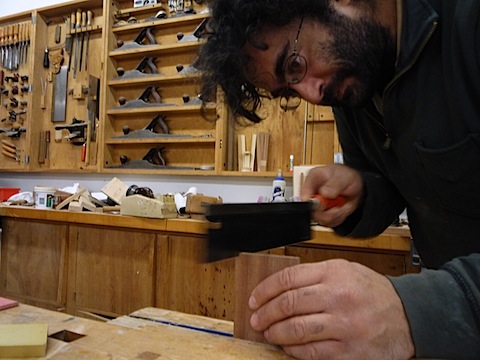
I use the tool to scribe a knife line on the edge of the board. The slight depth of the knife line will allow my chisel to lock in. This is the only way to chisel a straight line.
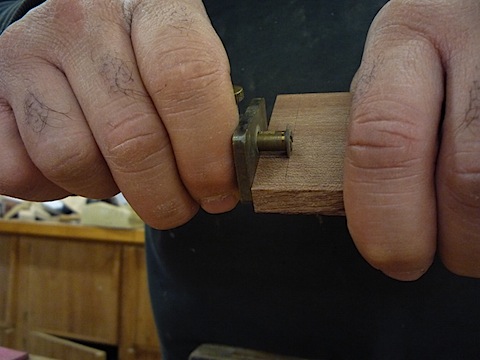
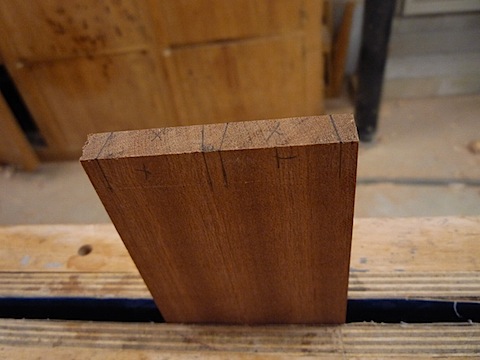
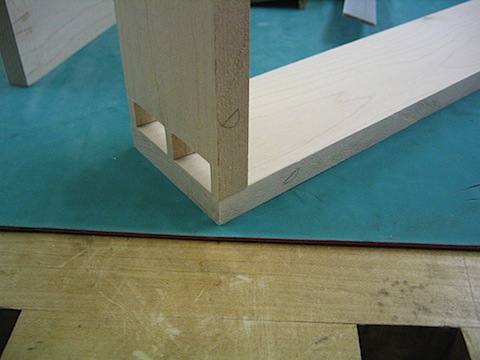
I place the board in my bench vise and use a different layout tool to draw the angles of the pins on the end of the board. A dovetail joint is made up of a matched set of pins and tails. I always cut the pins first. Some woodworkers cut the tails first- not me.
I always put an X in the part that needs to come out. I have made the mistake of cutting tot he wrong side of the line which results in sloppy dovetails. The X helps me remember to saw on the waste side of the line for a perfect fit.
The best way to do the cutting is with a hand saw. I saw on the X side of the line and I go right up to the knife line. If I saw past the knife line the joint will be ruined. Sawing is one of those activities that benefits from practice. If you are doing this for the first time practice cutting some straight lines. It will pay off when you cut the dovetails.
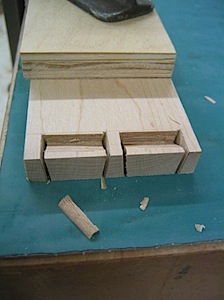
The next step involves chiseling the waste out. This is best described via video.
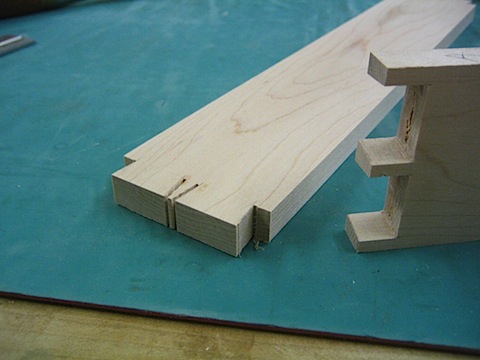
I got into my work and I did not document the rest of the process. I will continue with the drawer from a different project. Below you can see the half chiseled waste. I will flip the board and clean up the rest from the other side.
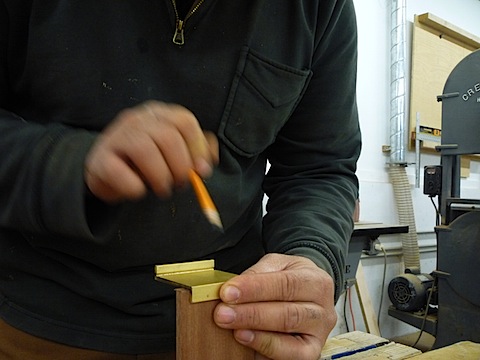
I place the pin board on the matching side and use a sharp pencil to accurately lay out the other side of the joint.
Back tot he hand saw and chisel to form the tales. It is the same process that I used to make the pins.
Ready to go together

The end results!
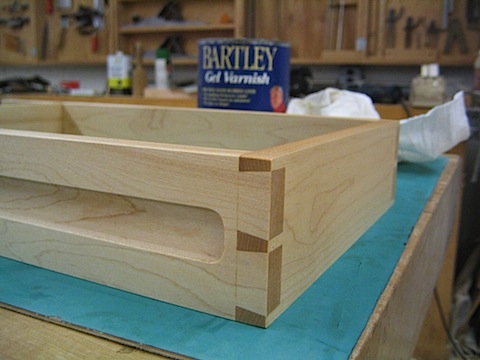
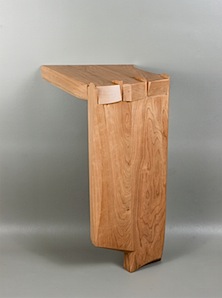
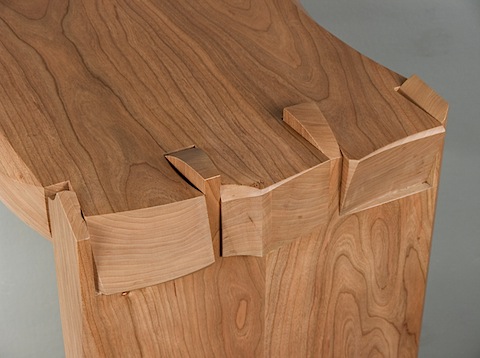
I often use the dovetail for more than it was intended. I push the pins and the tales past each other and then cut and facet them into the composition. The result is a tectonic landscape of movement. The dovetail become the structural decoration in the piece. Here is an example of large dovetails in this piece that leans against the wall.